8 Tips for Saving Money On Your Next Custom T-Shirt Order

November 14, 2022

T-SHIRT GUIDES

8 Tips for Saving Money On Your Next Custom T-Shirt Order

November 14, 2022
Are you about to place a custom apparel order and looking to save a few bucks? You came to the right place.
This post will give you a series of tips beyond discount codes to bring your cost per item down, meet your budget, and highlight some important trade-offs. Let’s save you some money.
How much do custom T-shirts cost?
This is by far the most common question we get asked. Our pricing is primarily based on the product selected, quantity, and the number of colors in your design. We use volume pricing so the more items you order, the less you pay per unit. We’re also proud to offer free shipping on every order to help you save.
For a more detailed look, here are the factors that impact our custom t-shirt pricing:
- Apparel product
- Quantity
- Print locations
- Print methods
- Number of ink colors
- Personalization
- Size breakdown
- Turnaround time
Based on those factors, we’ve highlighted 8 money-saving tips below to reduce the cost of your custom apparel order, in addition to any RushOrderTees promo codes. These rules can apply to just about any type of garment we offer and print method. Following these tips could save you upwards of 50% off your cost per item. And in some cases, much more.
1. Choose the right products
Not all products are created equal, and they’re not priced equal either. Some items in the same category can cost as much as double their budget counterparts. So your selection of product is going to be a big part of the overall cost of the order.
While our premium selections are going to be the best quality material, comfort, and construction, you may want to choose a budget-priced item– especially if your tees are for promotional giveaways or one-time use. If you are selling merch or providing employees with branded workwear, we suggest going with our premium items.
When you’re browsing our product catalog, looking at T-shirts, for example, you can filter your search based on budget, moderate, or premium. Here are the three top T-shirt categories, based on price point:
Beyond budget considerations, the product choices should be based on:
- The purpose of the garments. If they will be merch you should buy the highest quality. If they will be worn once as a gag, go with the cheapest. If it’s a promo shirt that you want to be worn, maybe somewhere in between.
- The expectation of wearers. Are they expecting comfort? You might want to get tri-blends. Are they expecting a fashion fit? You should go with premium brands like Bella+Canvas or Next Level.
- The environmental conditions. Are the shirts for workers who will be in the sun, or uniforms for your softball league? You might want to get 100% polyester which controls temperate and wicks moisture.
- Your brand identity. Are you a fashion-forward brand or does your following prefer more classic fits? Does your company employ a younger, hip staff? You might want to stick with premium to make sure they get worn.
Fabric types make a big difference in regards to the quality, durability, comfort, and performance of the garment. If you want to learn more about fabric types and their pros and cons, read this article about cotton vs polyester vs blends which breaks down the differences.
Pro tip: If you’re in the market for tri-blends, which are known for being lightweight, comfortable, and super soft (many people’s favorite kind of T-shirt), but are also known for being one of the pricier choices, look into CVC T-shirts instead. CVCs are the heathered/blended versions of some of the more popular cotton T-shirts. While they tend to have limited color choices, they share some of the same properties as tri-blends, but at a much lower price point.
2. Increase your quantity
The old adage ‘buy more, save more’ applies here. Increase your overall quantity, and the price per piece drops down. And it can drop dramatically when you get into larger orders. With our “rolling discount” model, we provide price breaks all through the various sized orders and quantities, and you can use the Quote Calculator to find them.
For example, a black premium T-shirt screen printed with a 3-color front will run you 3.48 per piece when you order 25. That same exact T-shirt and print are only .86 when you order 300. That’s almost 50% savings! And there are many price breaks in between those two order sizes.
Pro tip: Don’t place a small sample order to see how they look. We guarantee our quality, so if you’re planning on doing a big order, do it all at once and get the full savings of a bulk order.
3. Reduce the number of print locations
Print locations play a big role in the total cost of your order. Pricing is based on the number of colors– per print location. For example, if you have a 5-color design going on three different locations, that’s a total of 15 imprints (or screens). Your order will be 3x the cost of a single-location print job.
So an easy way to reduce your cost is by reducing the number of print locations. If you have multiple print locations on a T-shirt order, let’s say a front, back, and both sleeves: Is the same design going on both sleeves? Just print one sleeve. Or maybe you don’t need the sleeve prints at all?
Reducing your print locations from four to two would significantly reduce the overall cost of printing.
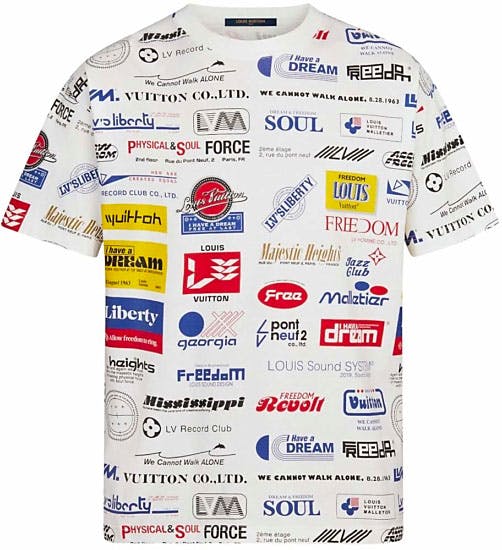
Of course, this question depends on the purpose of those T-shirts and if you’re following standards. Sometimes less is more. To get a better understanding of your options, read this guide to print locations and standards.
The trade-off: Visibility. Your logo or design might only be seen from one or two angles rather than three or four. If you’re sponsoring an activity with a promotional shirt or branding your workwear, you may not want to give up the visibility.
4. Choose the right print method
We have several print methods to choose from: screen printing, DTG, embroidery, vinyl names and numbers, heat transfers, patches, and digital sublimation. We also handle most of the special requests our customers have. You read more about our services and learn about those print methods here.
There may be circumstances when you should screenprint rather than embroider, or use printed vinyl rather than screen printing. For smaller orders, you may want DTG if your design has a lot of colors. And when it comes to uniforms, you can either get dye sublimation or the more traditional cut vinyl.
If you’re not sure which to get, have specific questions, or just want to learn more about custom apparel, don’t hesitate to contact our sales team and they will make sure we use the right print method for your budget and needs.
5. Reduce the number of ink colors
How many colors do you actually need? This is one of the most important questions when putting together your custom screen printing order. Pricing is based on the number of colors per location, so an easy way to get your cost down is to lower the number of colors to be printed.
For example, if your logo is 5 colors and you are printing on the back and also the left chest, you can think about printing a one-color version on the left chest. That will significantly reduce the overall cost of the order, without sacrificing much in the way of branding. Read more about this tip in our post about creating custom tees for your business.
Bonus tip: Avoid asking for Pantone color matches, if they are not crucial to your design. We have plenty of standard in-house colors that won’t cost you extra like a Pantone match does. Read more about Pantones here.
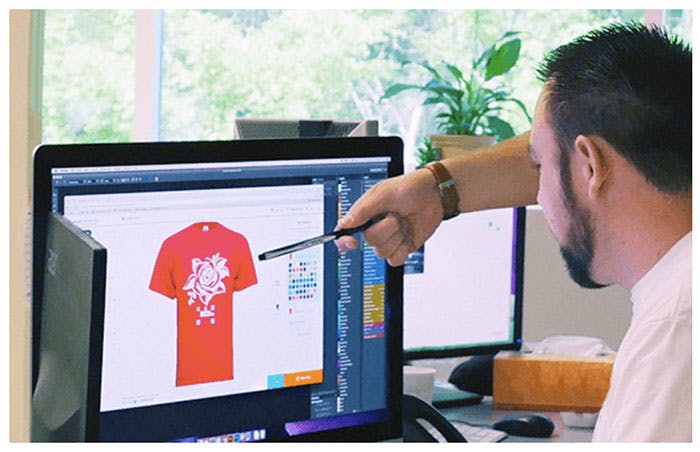
There are other ways to reduce the number of colors, and you can play around with these options with our easy-to-use Design Studio. Experiment with omitting certain colors and see how the design looks. There may be subtle or less significant colors that can be eliminated without changing the look of the design.
Let’s take a look at this example:
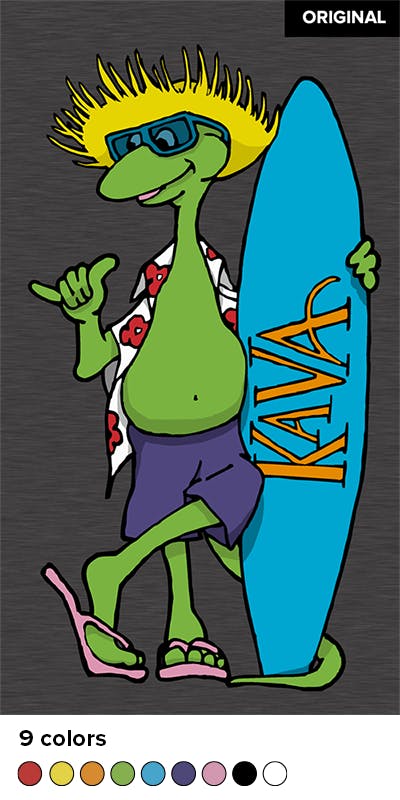
The first thing you want to do is a color count. This will give you your starting point. Then you can think about how many colors to reduce while keeping your desired look or requirements for branding.
There are 9 colors in the design, not counting the shading on the colors. A 9-color screen printed design will run up the cost per piece of your order– unless it’s a smaller order, in which case we can print this full-color using direct-to-garment printing. Let’s take a look at what reducing the colors would give us.
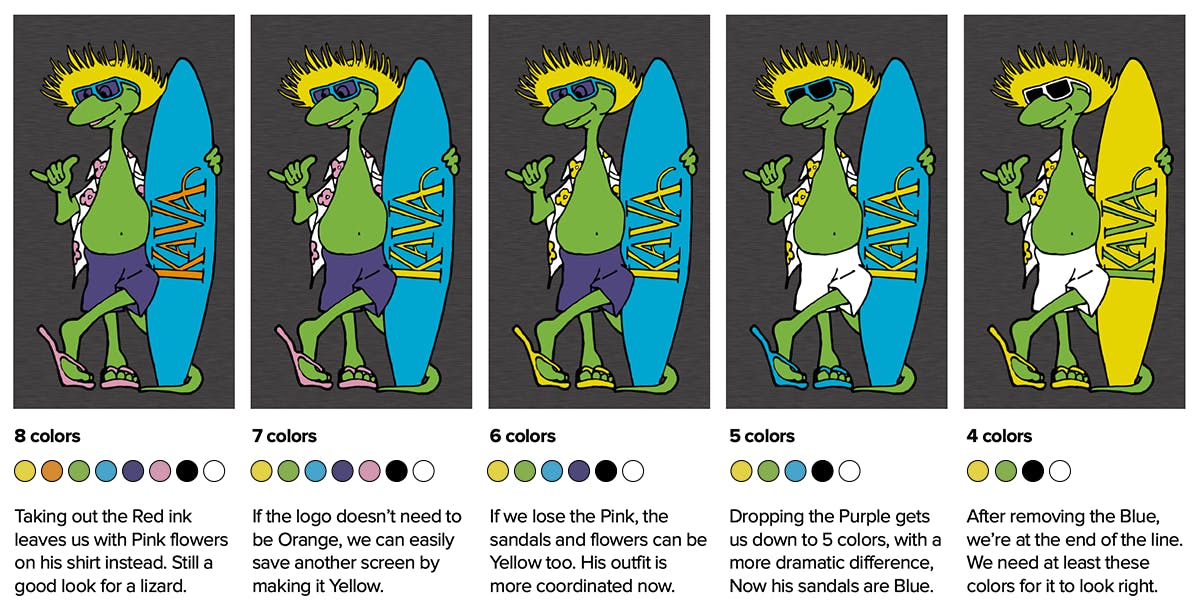
As you can see, you can get a different look for each color you reduce. This is when you make the calculation between the accuracy of the print and the constraints of your budget. Again you can use the Quote Calculator to learn how much you would save for each color removed.
For a design like this, once you go below 4 colors it will significantly change the look of the print. But maybe that’s fine, and you really just need to get the best price on your order. Here are those options:
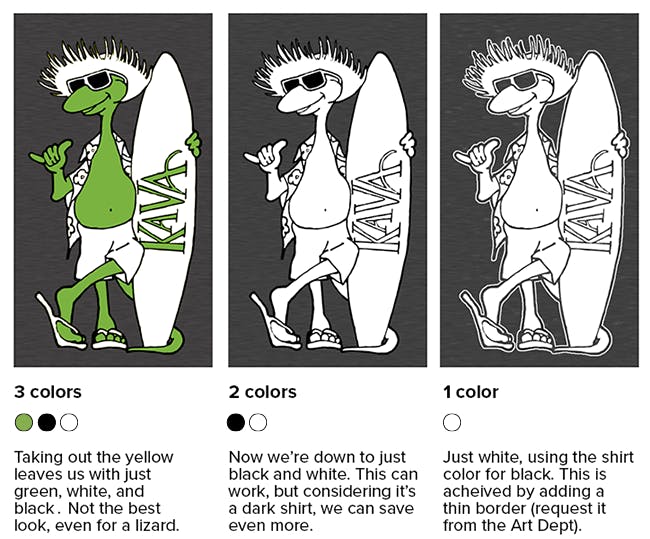
You can also change your design to 1 color easily in the Design Studio. This will give you a grayscale look and will be printed using halftones. Halftones are tiny little dots of different sizes to represent various shades between black and white. This will retain your shading and tones. The trade-off is it can have a somewhat grainy look, with subtle inconsistencies.
Halftones are a powerful way to reduce your colors on screen printed jobs. If you have a full-color image that is detailed and photographic with gradients, and you’d like to try to keep the look of your design while saving money, you can request a simulated process print. This uses the principles of process printing (CMYK) but uses spot colors.

With 4 colors on a white shirt or 5 colors on a black/color shirt (including white), we can reproduce a full-color image to surprisingly good results. We can’t guarantee color matches because of the variation, but we can get close.
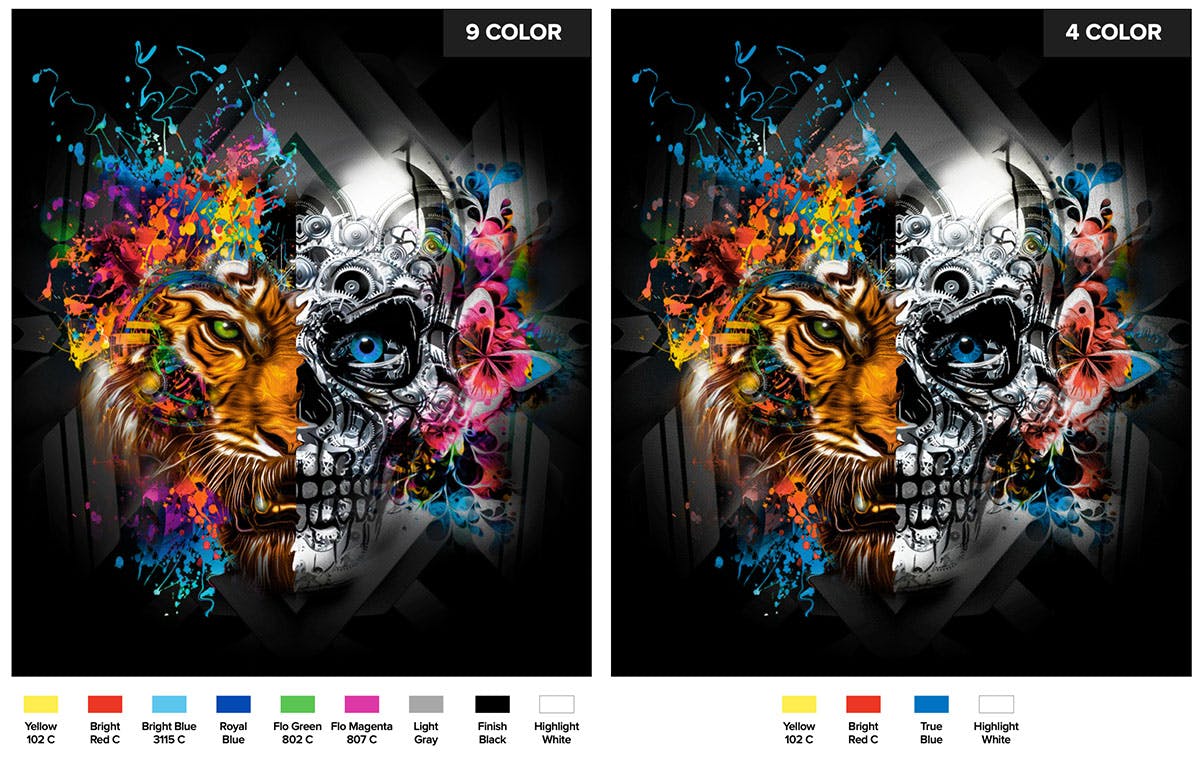
If you look closely you can see the differences in color reproduction, especially in the bright pinks, bright greens, and purples. Again, you want to think about what is important to you so you can make the best decision. This is a great way to reduce your cost on screen printing and can be applied to many types of artwork.
To request simulated process printing, add that to the Design Notes section in the Design Studio (below the T-shirt mockup) and a team member from Sales or Art will take care of your order.
Pro tip: Use the shirt color as an ink color. If one of the colors in your design is black and you’re getting black T-shirts, obviously you don’t want to print black ink (and we’ll make sure you don’t). The same goes for white on white. But if one of your ink colors is going to be navy, consider getting navy tees and using negative space in your design to represent navy, letting the shirt color show through.
6. Minimize the personalization
This tip applies if you are getting personalized team uniforms or any team shirts with custom names and numbers on them. When you order uniforms, we use dye sublimation to give you a fully customized, full-color “all-over” print, including the team logo and color scheme along with personalized names and numbers.
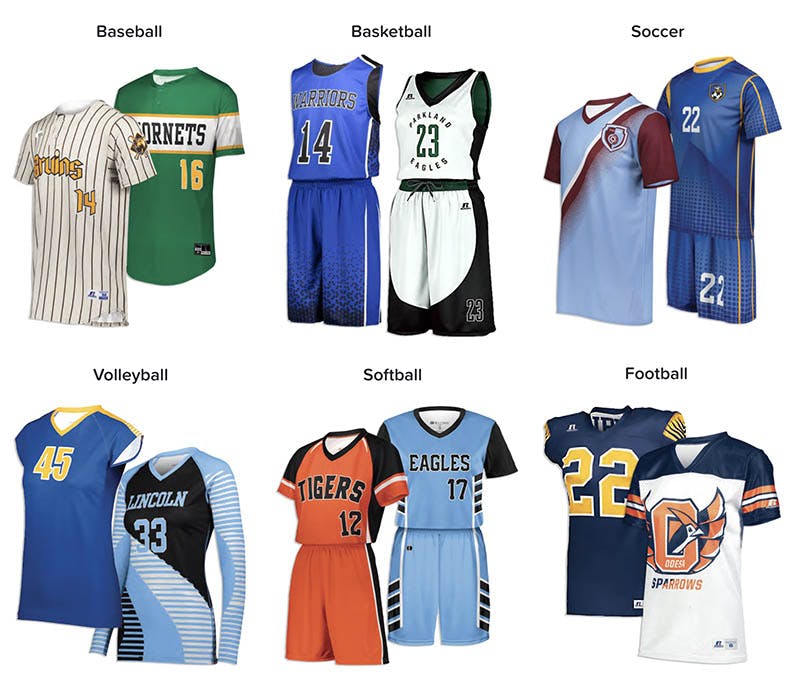
If you’re on a budget, we suggest going old school and getting vinyl names and numbers combined with a single color screen print on the front. This will reduce your cost per item to the point where you can get some extra shirts. It’s a good idea to have some extras (without names and numbers) in case a player forgets their shirt or someone falls into a mud puddle.
If you are getting both names and numbers, but have a very tight budget, you can consider leaving out the names but keeping the numbers. That will knock some of the cost down per shirt.
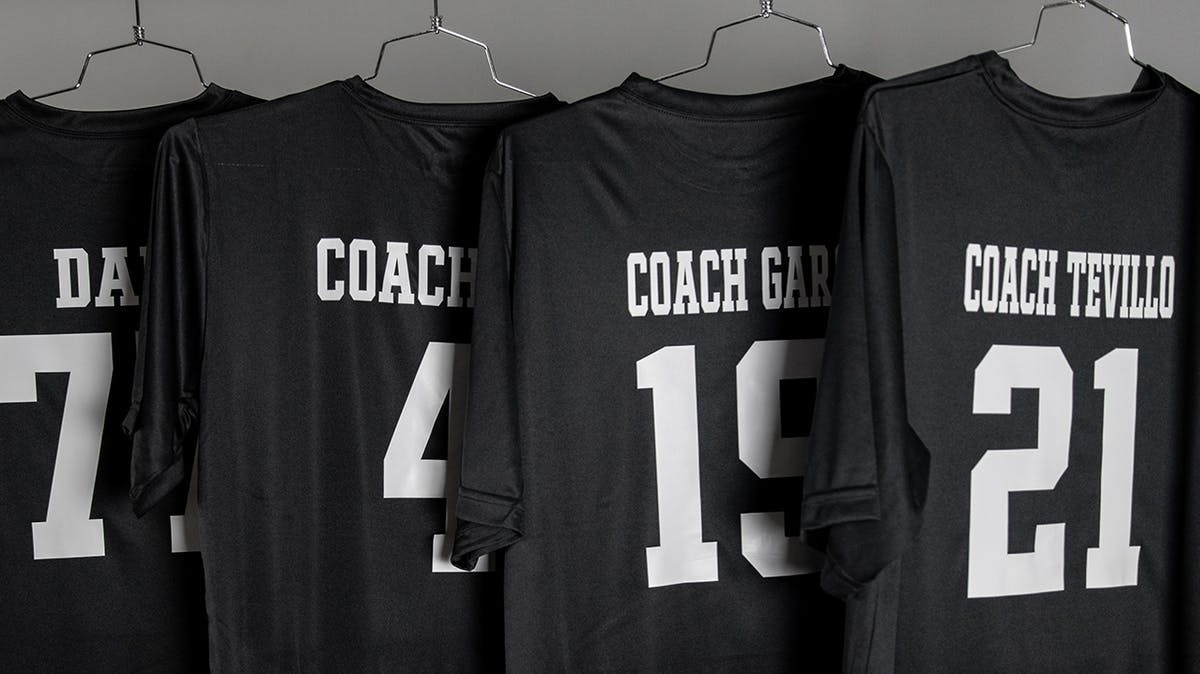
The trade-off: Team pride. Spending a few extra bucks per shirt and getting the full-color dye sublimation team uniforms on performance wear can boost team pride and morale. And if designed well, strike fear into the hearts of your opponents.
7. Choose the right size breakdown
This is one of the most overlooked aspects of placing a custom apparel order: getting the sizes right. If you get the sizes wrong, you could end up with excess inventory, or run out of the sizes you really need. You could have unhappy customers, teammates, or worse– have to place a reorder to make up the difference.
If you’re buying a small number of T-shirts, for example, make sure you know the exact sizes to get. Ask people– don’t guess. Some people might like to wear oversized shirts, some people like them more fitted. It takes a little bit of legwork to collect everyone’s preference, but it’s well worth the effort to get the order right the first time.
Each product page has a sizing chart you can look at, and they’re not always the same across different products. The sizing charts will help eliminate some of the guesswork. Here’s a typical sizing chart:
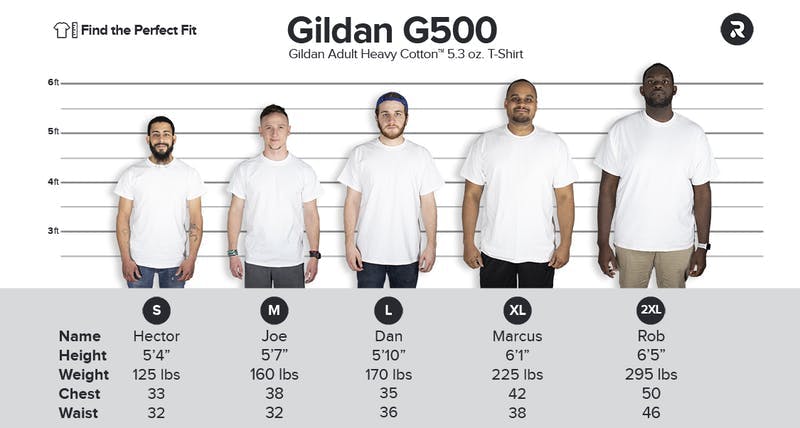
Keep in mind that sizes 2XL and up will cost more per shirt. That’s where you can get some savings on bulk orders. Don’t order more of the largest shirts unless you have to. If you’re not sure what kind of ratio to get, we have a post about how to choose the right size breakdown. You can also learn about how a T-shirt should fit.
8. Place your order as early as possible
This may seem like a no-brainer, but it’s worth mentioning. The cost of your order will be significantly less if we have 2 weeks (or 10 business days) to complete and ship it. So don’t wait– jump into our Design Studio and get the order started.
You can upload your art and get an idea of pricing within seconds. If you need more time to figure out your product selection, quantity, and size breakdown, save it without checking out.
If you do know your product selection, quantity, size breakdown, and print method (but are just waiting on the design or artwork) we suggest placing the order now. You can change the artwork, number of colors, and print locations during the proofing process. This will give us a head start on ordering your items to be printed and putting your job on the schedule.
The trade-off: Time. Any orders that are needed in less than two weeks will include a shipping charge. Any orders needed in less than a week can incur a rush charge on top of shipping. In other words, the longer you wait, the more your costs go up.
Bottom line: get your order in at least 2 weeks from your due date to avoid any rush charges– and enjoy free delivery.
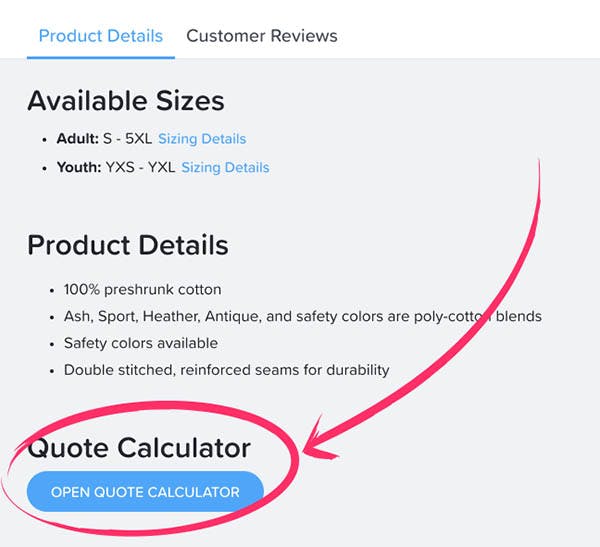
Pro tip: If you don’t have your artwork ready yet, you can still see how the charges work in our pricing calculator. Choose a product from our catalog and on the product page scroll down to the button that says “Quote Calculator” and choose your quantity and number of colors. This will provide your cost per item and show you the nearest price breaks without having to upload your artwork.
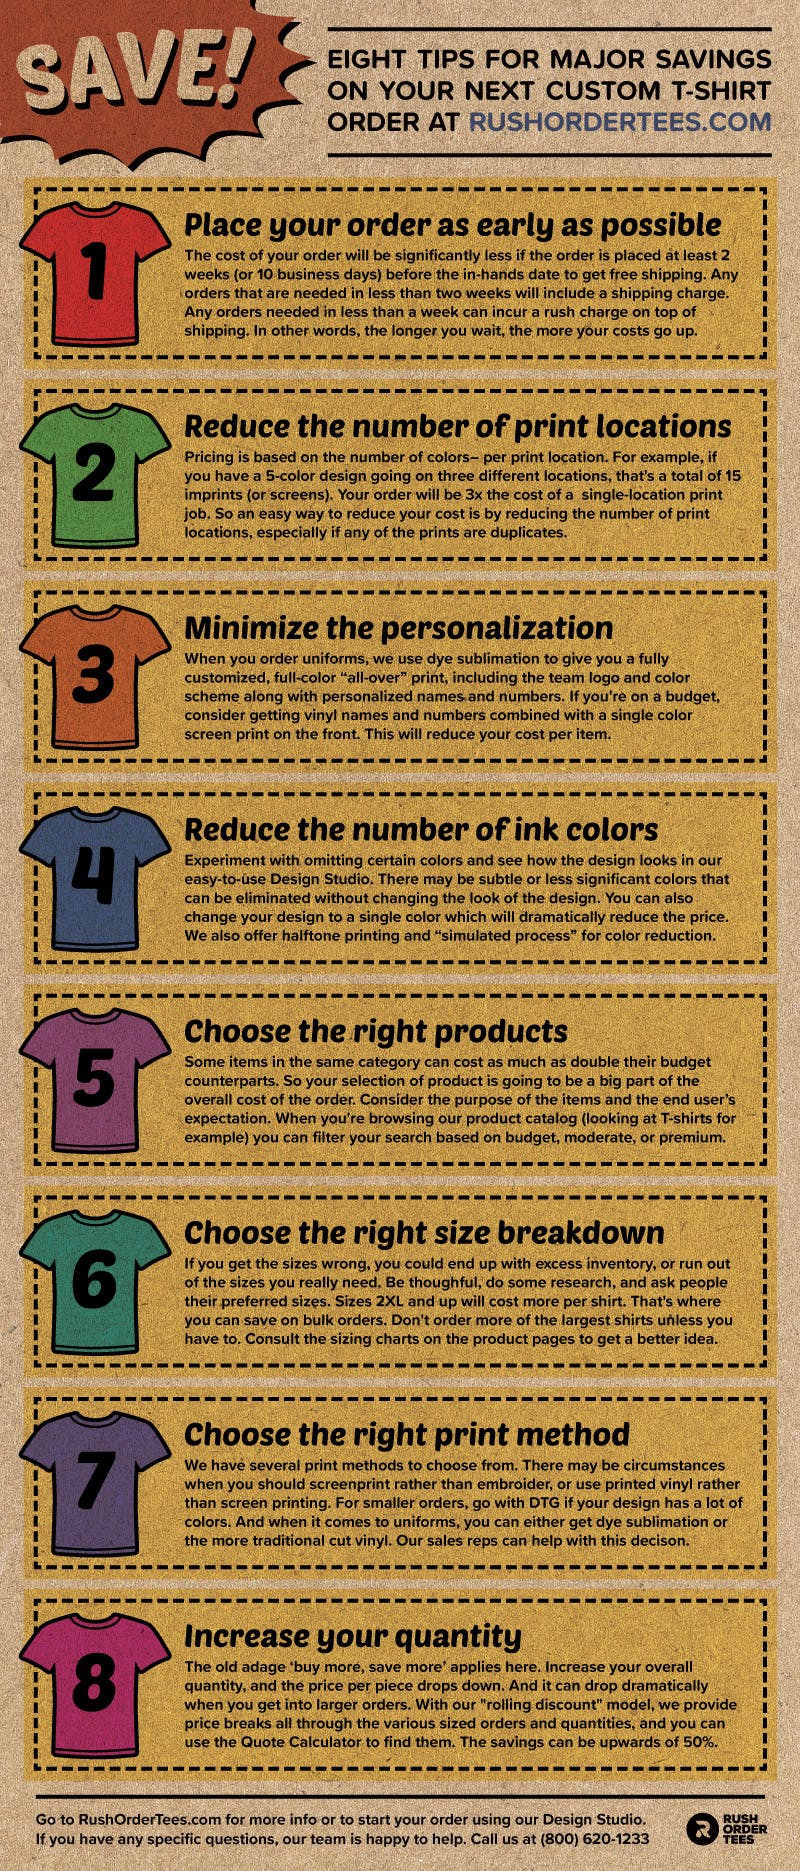
Follow these 8 tips and you’ll get much more bang for your buck on your next order! Save the infographic below for future reference, and you can read more about our pricing here.

Imri Merritt
About the Author
A graduate of the Multimedia program at the University of the Arts in Philadelphia, Imri Merritt is an industry veteran with over 20 years of graphic design and color separations experience in the screen printing industry.
